1.The Deploy
step is devoted to setting up the testing environment.
2.The Ripping step
carries out the GUI ripping process automatically and accomplishes the
crash testing activity.
3.The
Post-elaboration step analyses the crash testing results to produce
test reports and GUI models.
Preliminary
Step
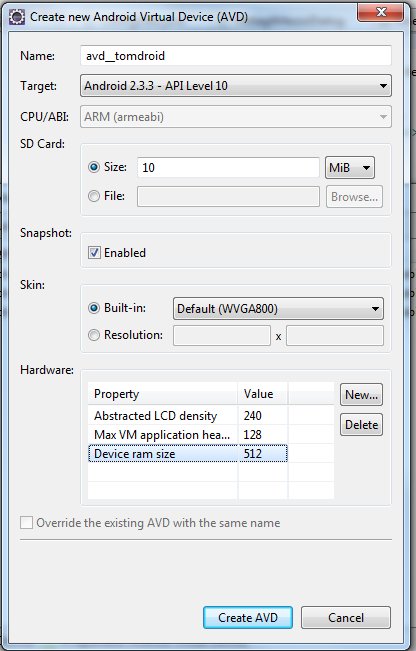
Creating the AVD
In order to carry out the GUI Ripping
activities, a virtual Android device is needed. An Android Virtual
Device (AVD) can be created via theandroidutility
of the SDK (seeherehow it
is possible).
Warning: it is strongly advised to create a new avd for any
ripper execution without reusing already used AVDs.
The
reference configuration for the AVD
to be created is the following:
a.Target: Android
2.3.3 - API Level 10 (or better)
b.SD Card: Size 10
MB (or better)
c.Snapshot: Enabled
d.Max VM
Application Header 128
e.Device Ram size:
512 (or better)
Once the AVD has been created,
the
following five steps have to be carried out.
Unzipping the package
The
demo_APPNAME.rar file has to
be unzipped in a folder of your choice. Rar files can be opened with
WinRAR.
The package contains four batch files (init.bat, install.bat,
execute.bat and postproc.bat) that will be directly used during the
process and a folder called batch with all the needed tools. Do not
move or modify the content of this folder!
Editing
init.bat
The file init.bat has to be edited by
indicating:
-The path of the
Android SDK (e.g. C:\android\android-sdk)
-The name of the
AVD that has been created (or the name of the device as reported by theadbAndroid
utility tool)
-The path where
the snapshot image are stored by Android (usually this path has a
format similar to
C:\Users\USERNAME\.android\avd\%AVDNAME%.avd\snapshots.img)
-The path where
temporary files are stored (usually it is %TEMP%\AndroidEmulator)
-The package of
the application under test
An example of init.bat (the highlighted
items
should be edited):
set
ANDROID_SDK=C:\android\android-sdk
set AVDNAME=avd_tomdroid
set SNAPSHOTPATH="C:\Users\mm\.android\avd\%AVDNAME%.avd\snapshots.img"
set TEMPORARYPATH=%TEMP%\AndroidEmulator
set APPPACKAGE=org.tomdroid
After you have edited the init.bat file, save it and continue.
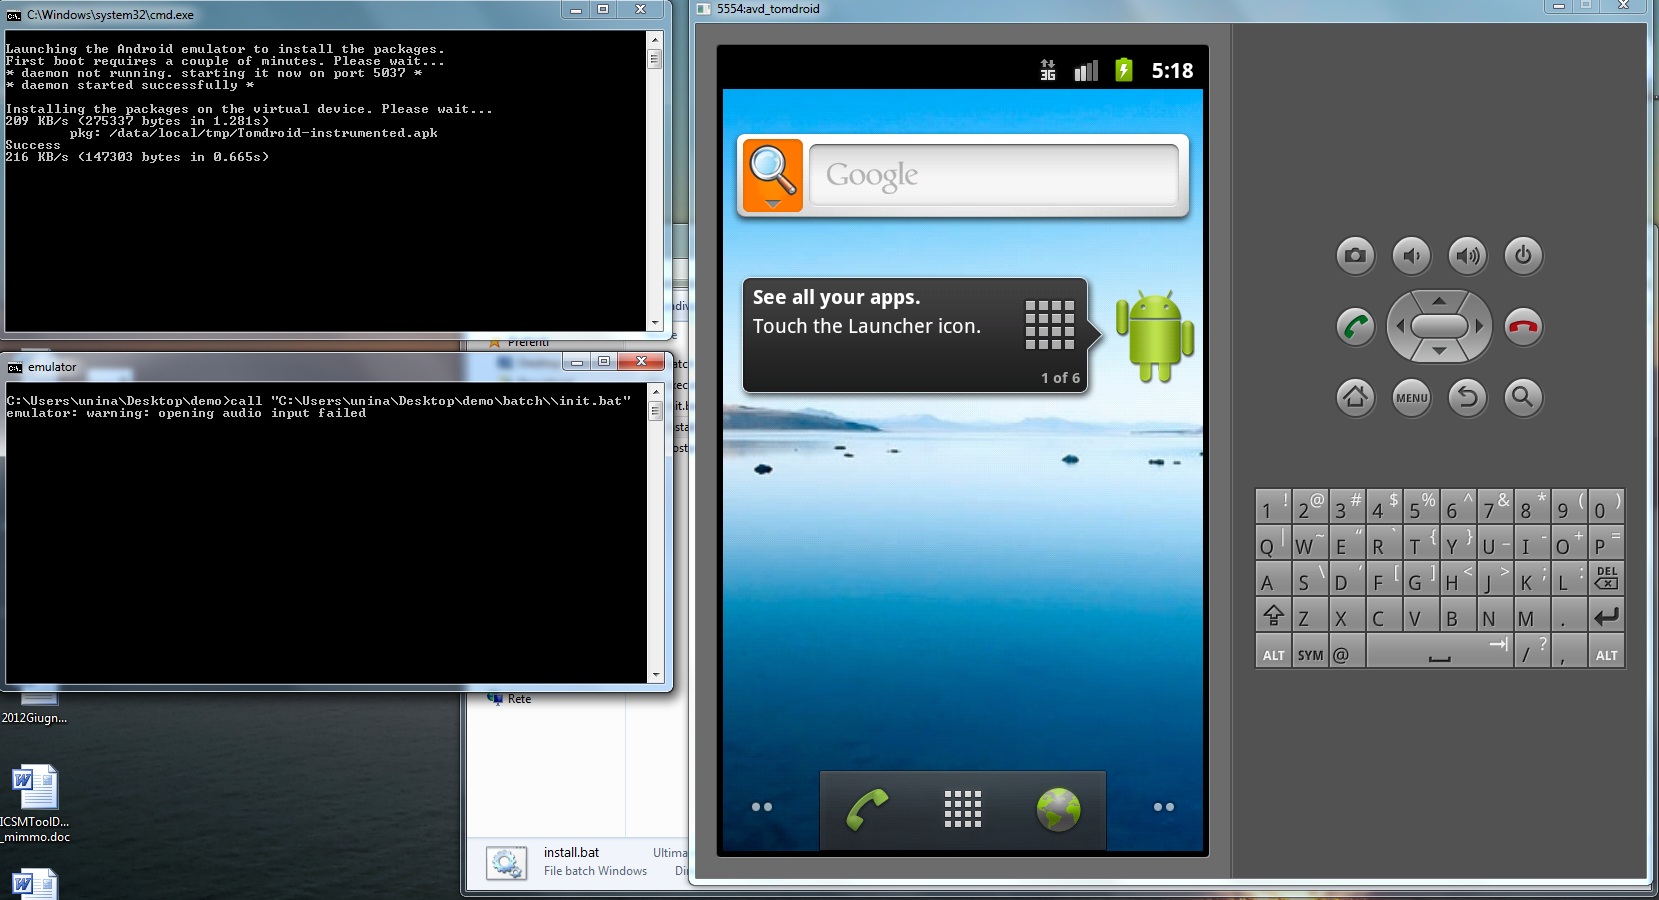
1.
Deploy Step
The Deploy Step is automatically
carried out by the install.bat shell script.
In the Deploy step, the code of the
Android application under test is instrumented by the Emma library (for
code coverage assessment) and deployed into the AVD
emulator tool together with the GUI Ripper itself. Successively, animage of the Android system, calledSnapshotimage,is
created, in order to be restored after each ripping step execution. It is recommended that the AVD has just be
created for this execution.
When the installation is terminated,
the user has to close the emulator window. The install step
lasts
about two minutes for the TomDroid case study on a Windows 7 PC.
2.
Ripper Execution Step
The Ripper Execution Step is executed
by the execute.bat shell script.
In the Ripping step, the application's
GUI is iteratively ripped and the GUI Tree model is incrementally
built. The Ripping is started by calling execute.bat. During the
execution, the emulator window will be opened and closed many times, as
well as some other command line windows. The user has to wait until the
emulator stops it (it is possible that the emulator window remains
opened: in this case you can check that exists a
closed.txt
file in the
subfolder .\files)
Warning: the ripping execution can last
several hours, depending on the complexity of the application under
ripping and of the performances of the machine.
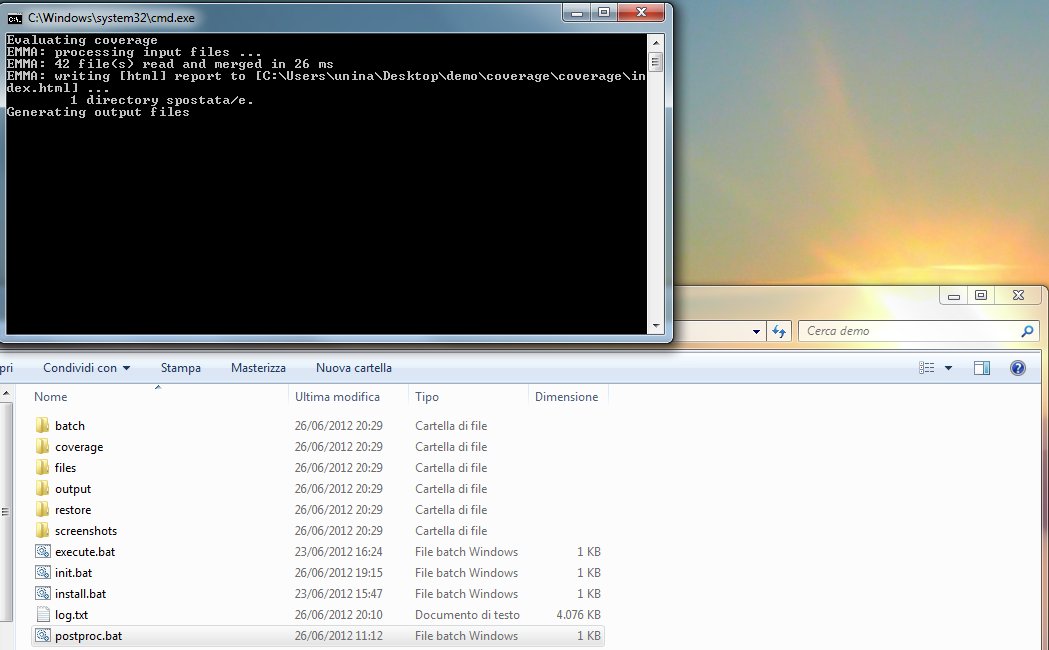
3.
Post-processing Step
The Post-processing Step is executed by
the postproc.bat shell script.
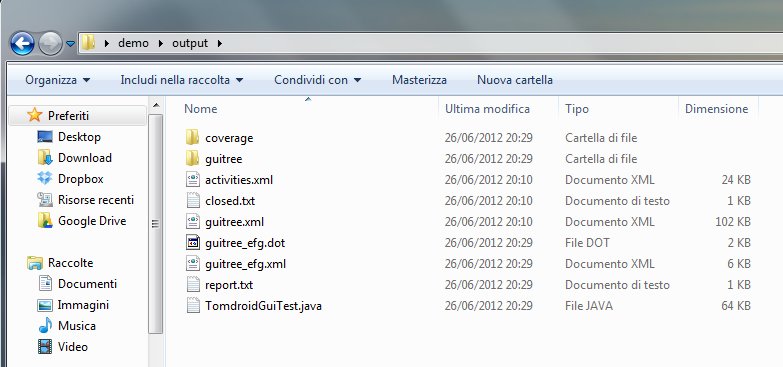
A post-elaboration of the raw
outputs of the Ripper is needed. In order to carry out the
post-elaboration, you have to execute postproc.bat: its
execution lasts few seconds. The following artifacts will
then be produced and stored in the .\output folder: